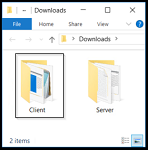
On the Opera 3 SQL SE server and all the client PCs, run Setup.exe from the Client download folder .
Complete the steps in the wizard setup.
Complete on each client PC.

In this stage, you must install the Opera 3 SQL SE client software on each client PC using the setup wizard.
All actions for stage 1, stage 2 and stage 3 must be completed.
Client PCs must be running Microsoft Windows 10.
Microsoft .NET Framework 4.7.2+ must be installed on each client PC.
Make sure the Firewall rules are set up correctly.
If necessary, download and install from www.microsoft.com/en-us/download/details.aspx?id=49982.
The easiest way to check the version of .NET that is installed is to check the registry.
Follow these instructions.
Run 'regedit' from the Start menu (run as administrator).
In the Registry Editor, open the following subkey: 'HKEY_LOCAL_MACHINE\SOFTWARE\Microsoft\NET Framework Setup\NDP\v4\Full'. The version number is shown below Full.
If the Full subkey is not present, then .NET Framework 4.7.2+ may not be installed. Different registry keys may be used in some Windows operating systems.
Follow these instructions.
If you haven't updated the 'Setup.peg' file with the name of the Opera 3 SQL SE server you must do that now. See Stage 2: Installing server software.
On the Opera 3 SQL SE server and all the client PCs, run Setup.exe from the Client download folder .
Complete the steps in the wizard setup.
Complete on each client PC.

The server software and client software are now installed.
If you are going to migrate your company's data from Opera 3 (Visual Foxpro database) or Opera 3 SQL, follow stage 5 to run housekeeping routines in that product before migrating the data.
If you are not going to migrate data, you are ready to use Opera 3 SQL SE.
The demonstration data - company 'Z' Orion Vehicles Leasing - is available to use when experimenting with the features in Opera 3 SQL SE. Before using the demonstration data in Opera 3 SQL SE take a backup of it using the Backup command on the Utilities menu in the System Manager. The data backup can then be restored to its original state if required.